hats hats hats

You might think that I’d get over hats, but if that’s the case, it hasn’t happened yet. I have two hats today, one made for my friend James, Flick’s partner, and one for my boyfriends father.

crochet hats_20140909_193735

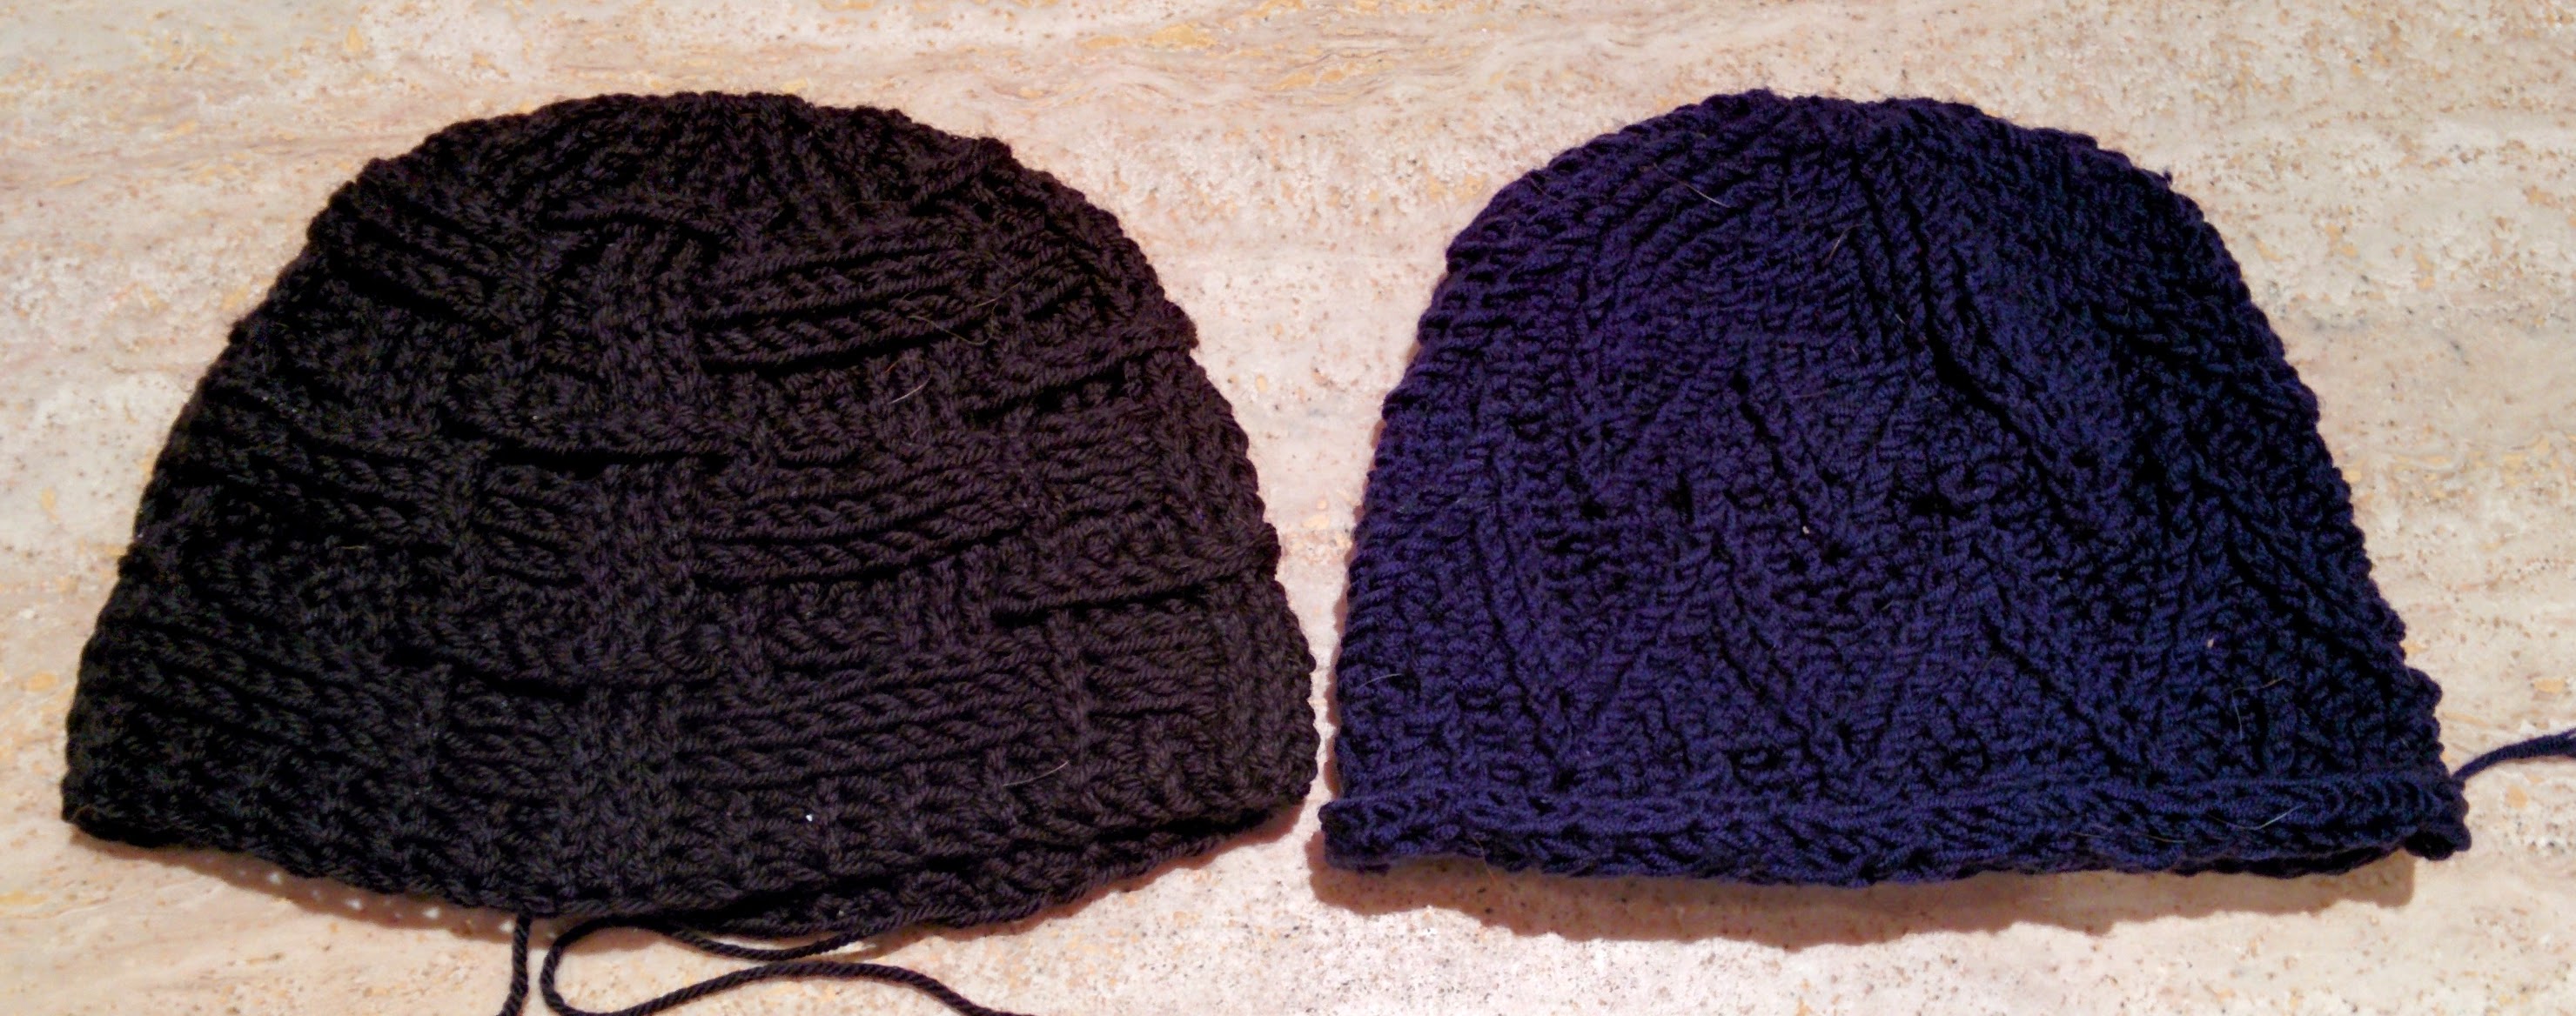
Here they are unblocked. They both made from patterns by Aaron Matthew Asmussen. The black beanie, for my boyfriends father is from the Open Weave pattern. And the blue beanie for James from the Zig (aka Charlie Brown) pattern.

The first hat I made from Aaron’s patterns used the Open Weave pattern, this one was for my boyfriend, it’s interesting going back to the pattern now that I have much more experience with these cable hats. The Open Weave remains the most complicated of Aaron’s patterns that I’ve tried. I think it’s because his other pattern use only front-post and normal stitches, where as Open weave also uses back-post stitches as well. And the number of pattern repeats changes between rounds, which adds another level of complication. As with any pattern like this, it’s a matter of following the pattern carefully and having patience, particularly with the changing repeats, because it’s easy to make incorrect assumptions about rounds.

crochet hats_20140911_143727

Here are the two hats, blocking over balloons, which have been blown to the circumference of a larger man’s head. You might remember that when I blocked Flick’s hat this way, I ended up having to rip back the last round, because the brim was still curling up. This is because front-post stitches tend to curl outward, and the balloon curves inwards, so while the rest of the hat is blocked nicely the brim needs a bit more attention.

crochet hats_20140909_194931

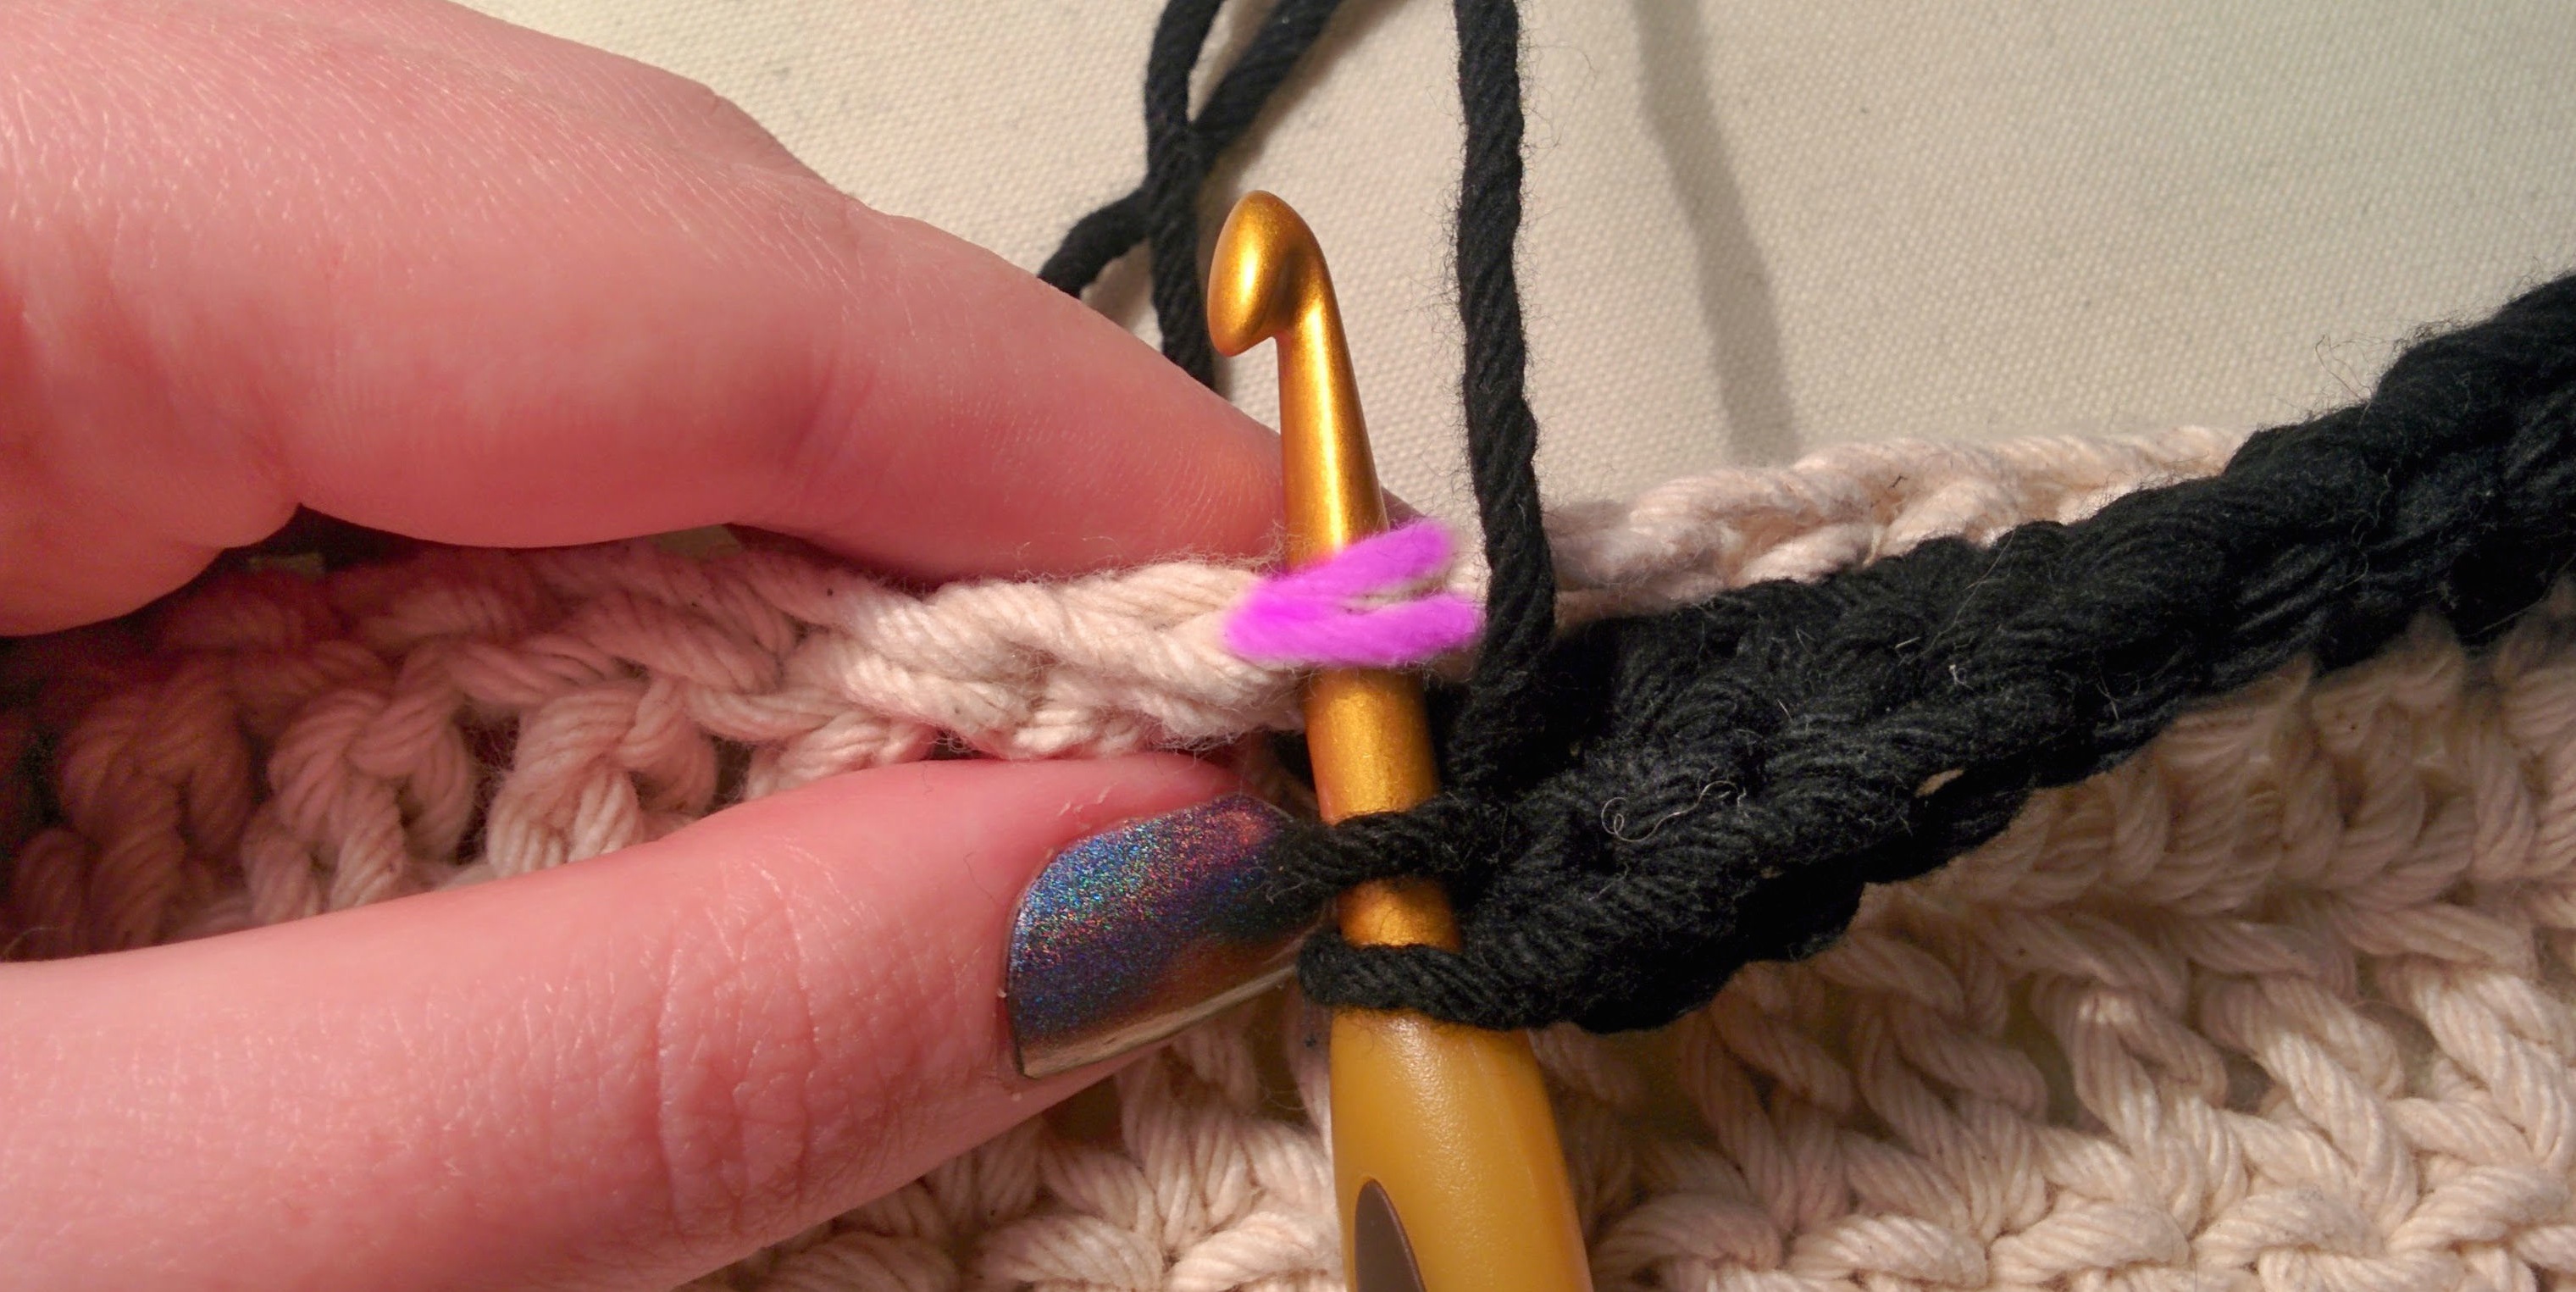
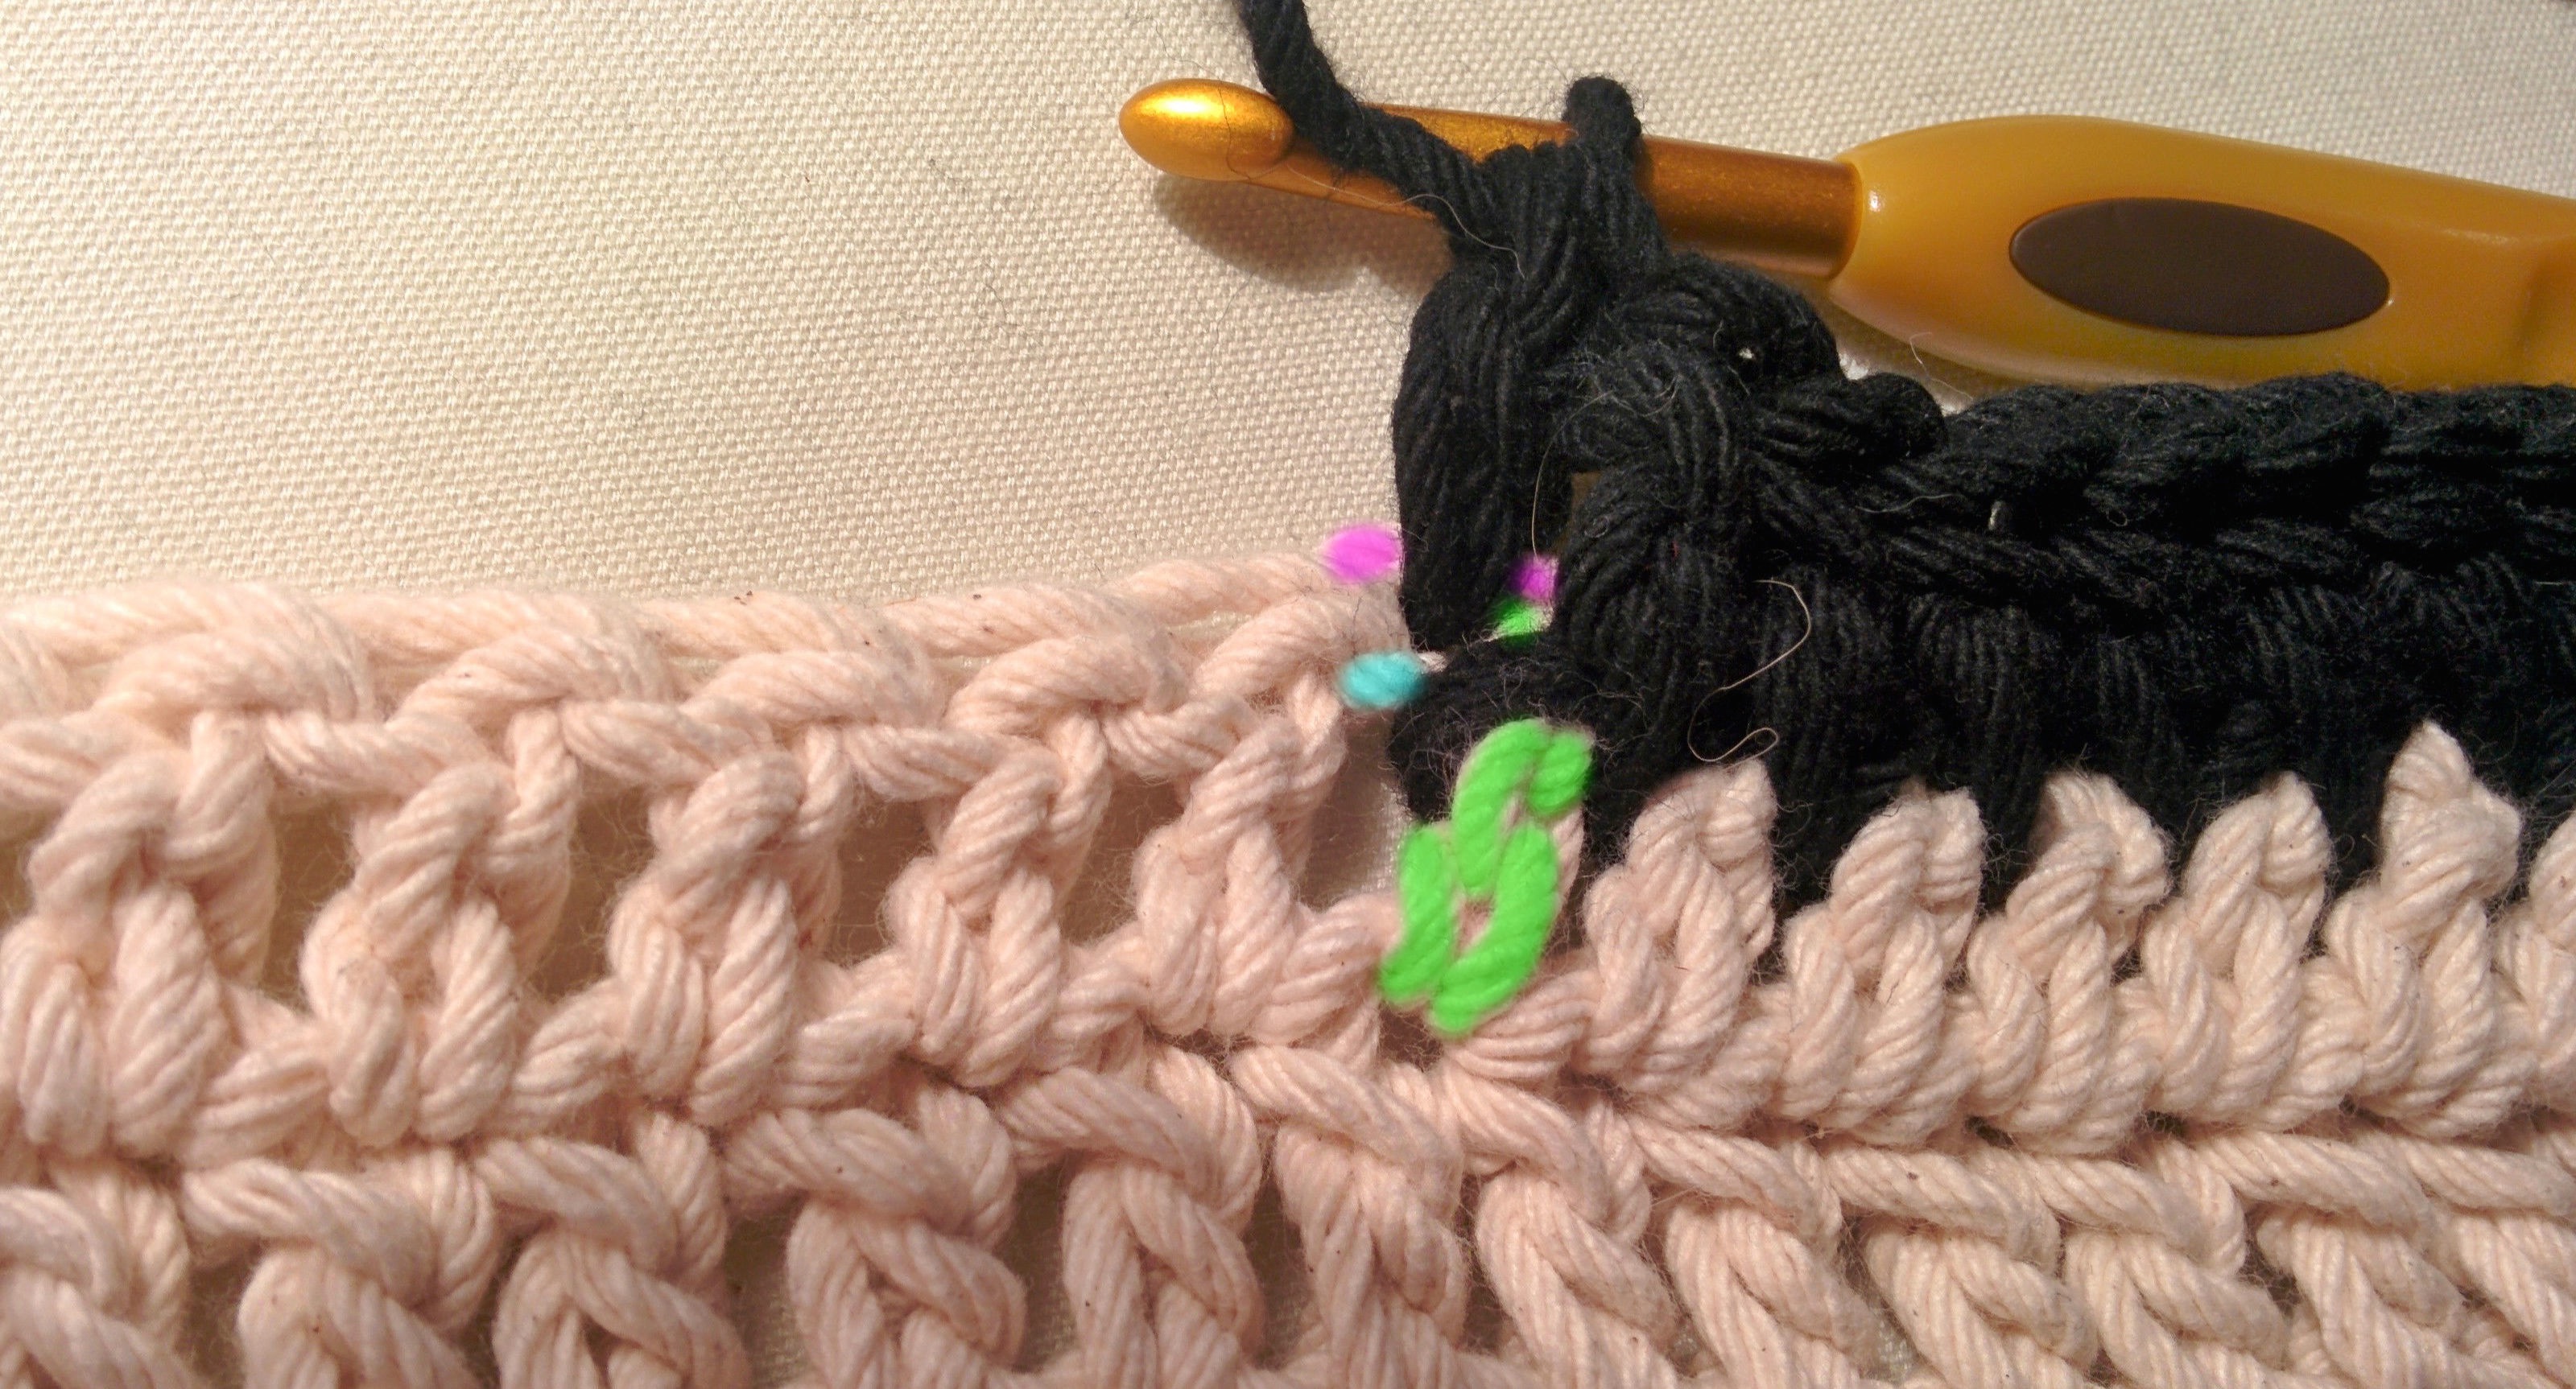
To address this problem, I took some yarn (actually crochet cotton) and threaded it through the last round, so that I could pull it in to the base of the balloon. I made sure that the round was sitting flat, without any curl. Since the balloon is narrower at the bottom, I obviously wasn’t introducing any stretch in the brim, but I wasn’t worried about that, I just wanted to straighten it out, in fact a snug brim is nice, it will stretch to the prefect size with wear.

(I didn’t have to worry about this with the black hat, because I ended it with a few rounds of alternating front-post and back-post stitches. Front-post stitches curl out, back-post stitches curl in, so the brim ended up straight :) )

crochet hats_20140911_144432

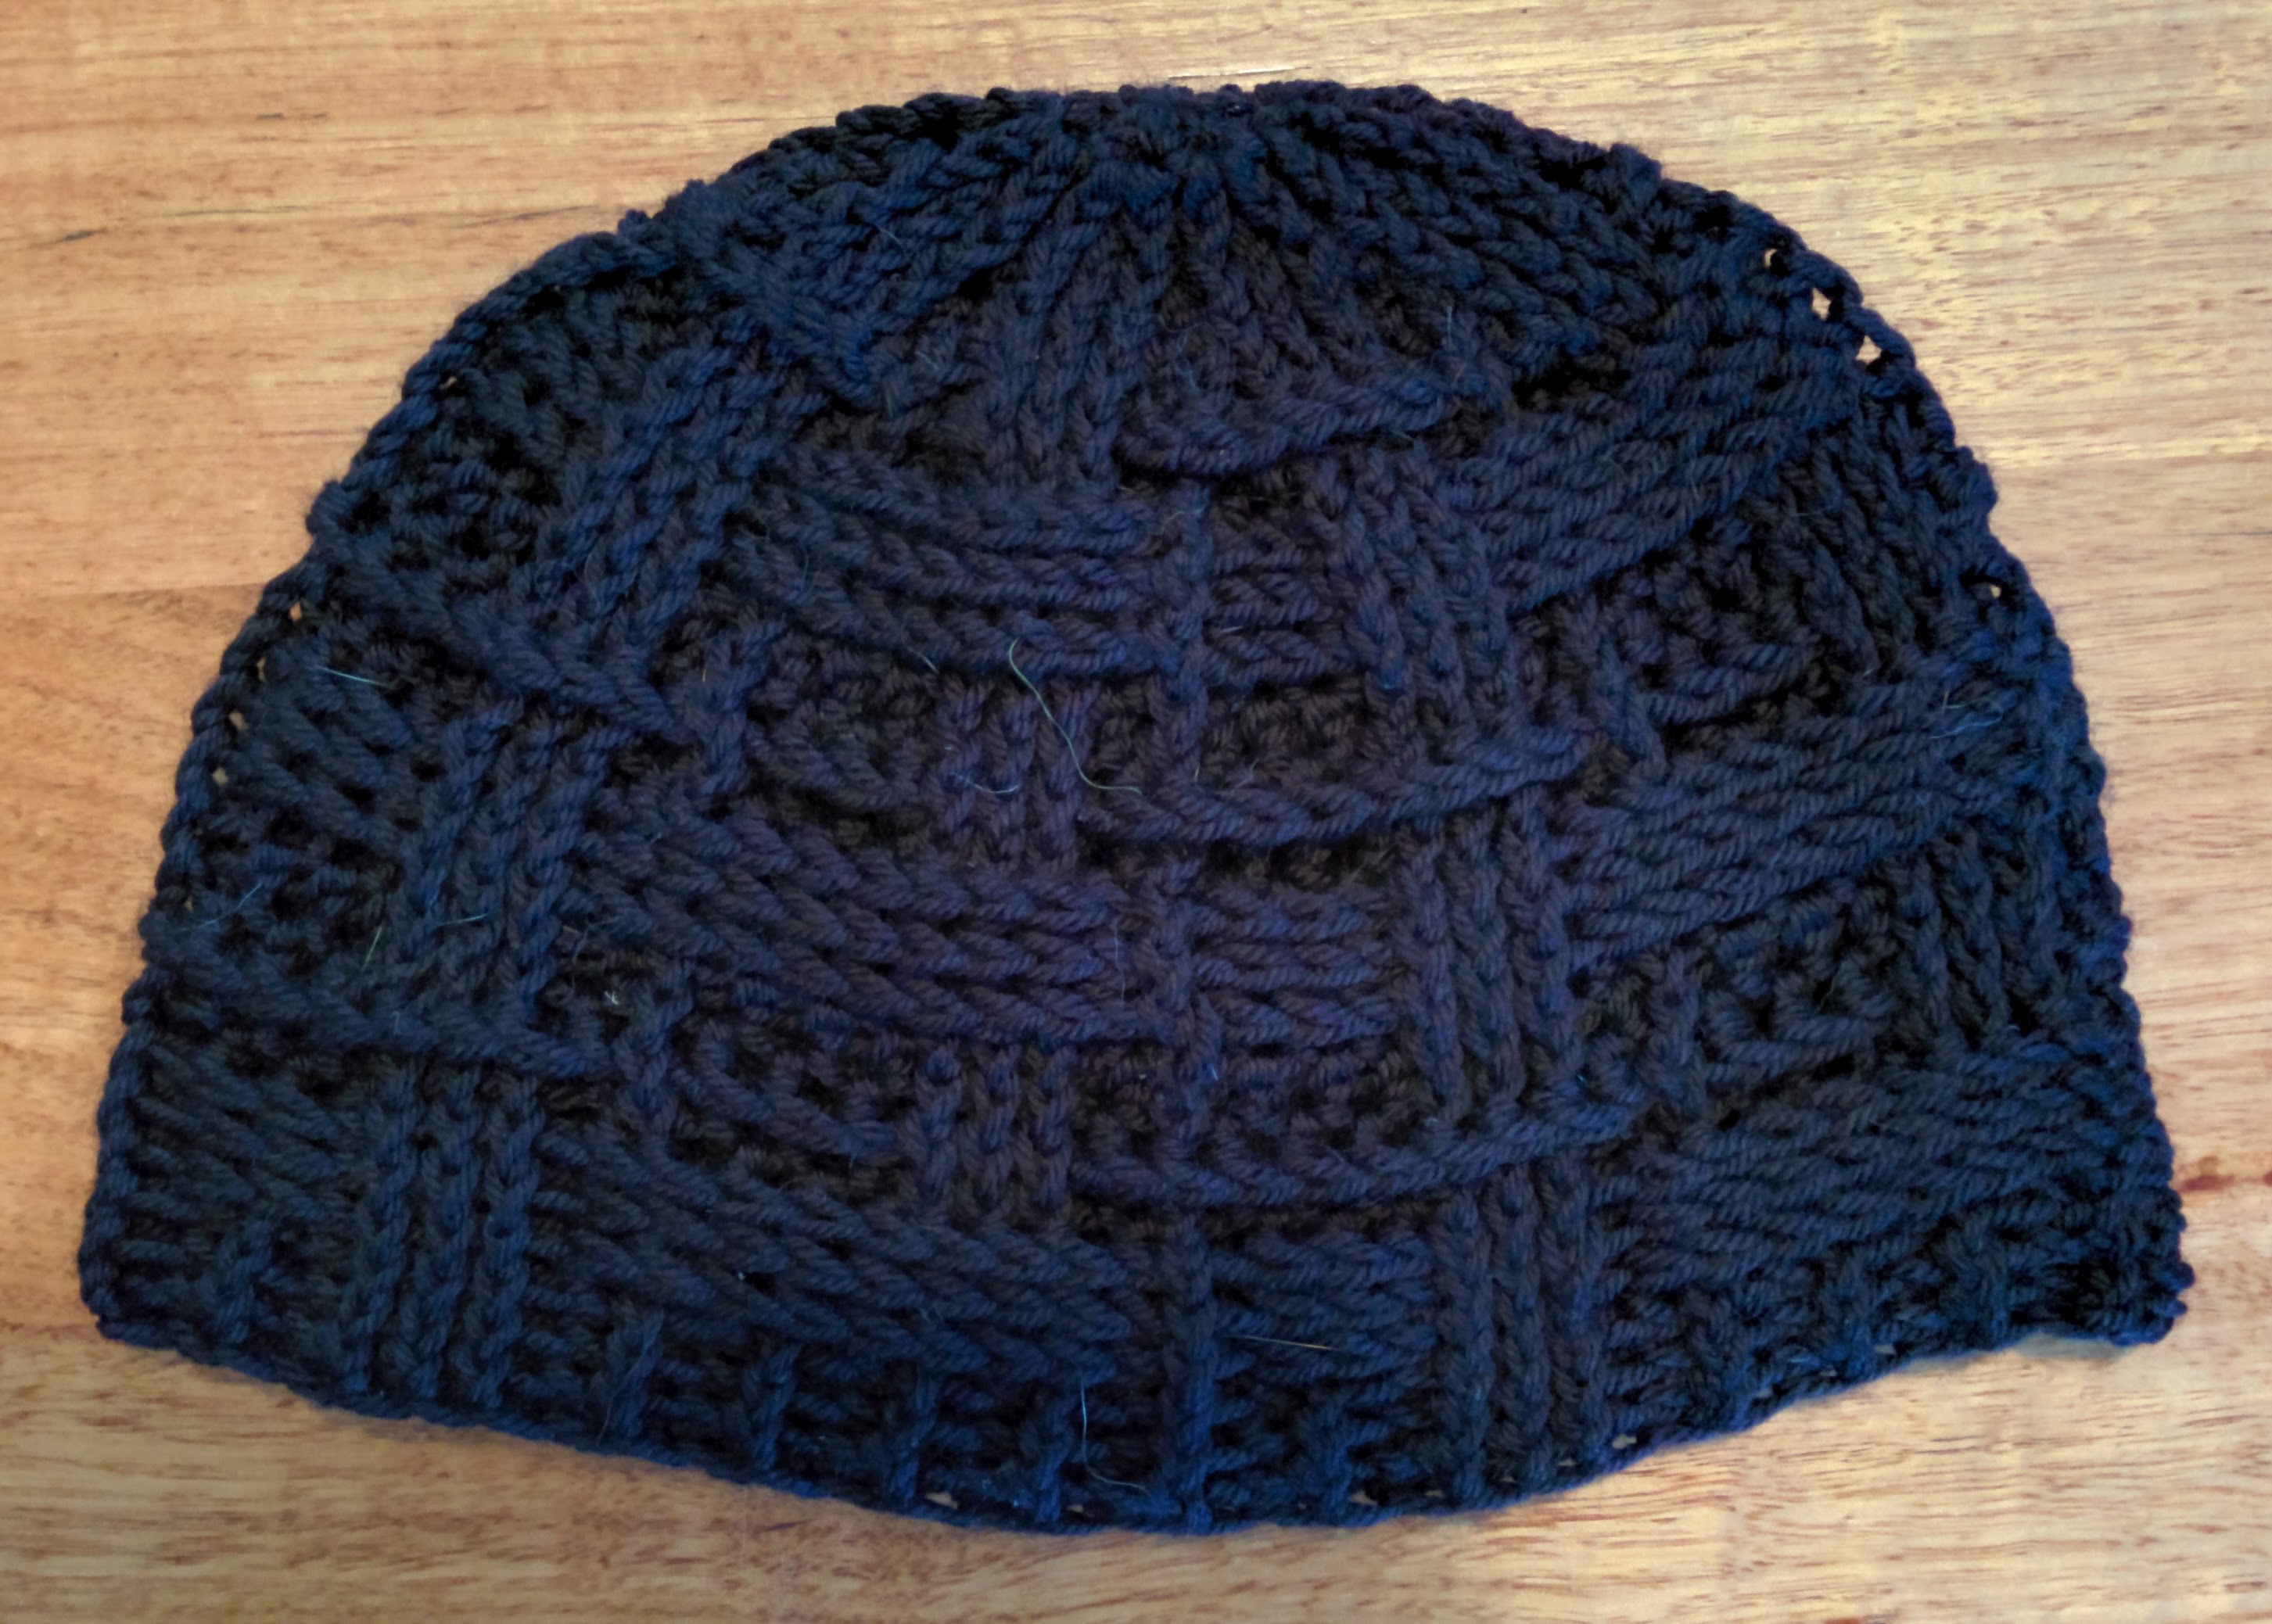
Here’s the blue hat, ready to go to it’s new home. But the way, I used Morris empire, worsted weight (10-ply) for this hat, and a 5.5 mm hook, half a size bigger than the pattern suggests to make the hat a bit bigger.

crochet hats_20140911_144413

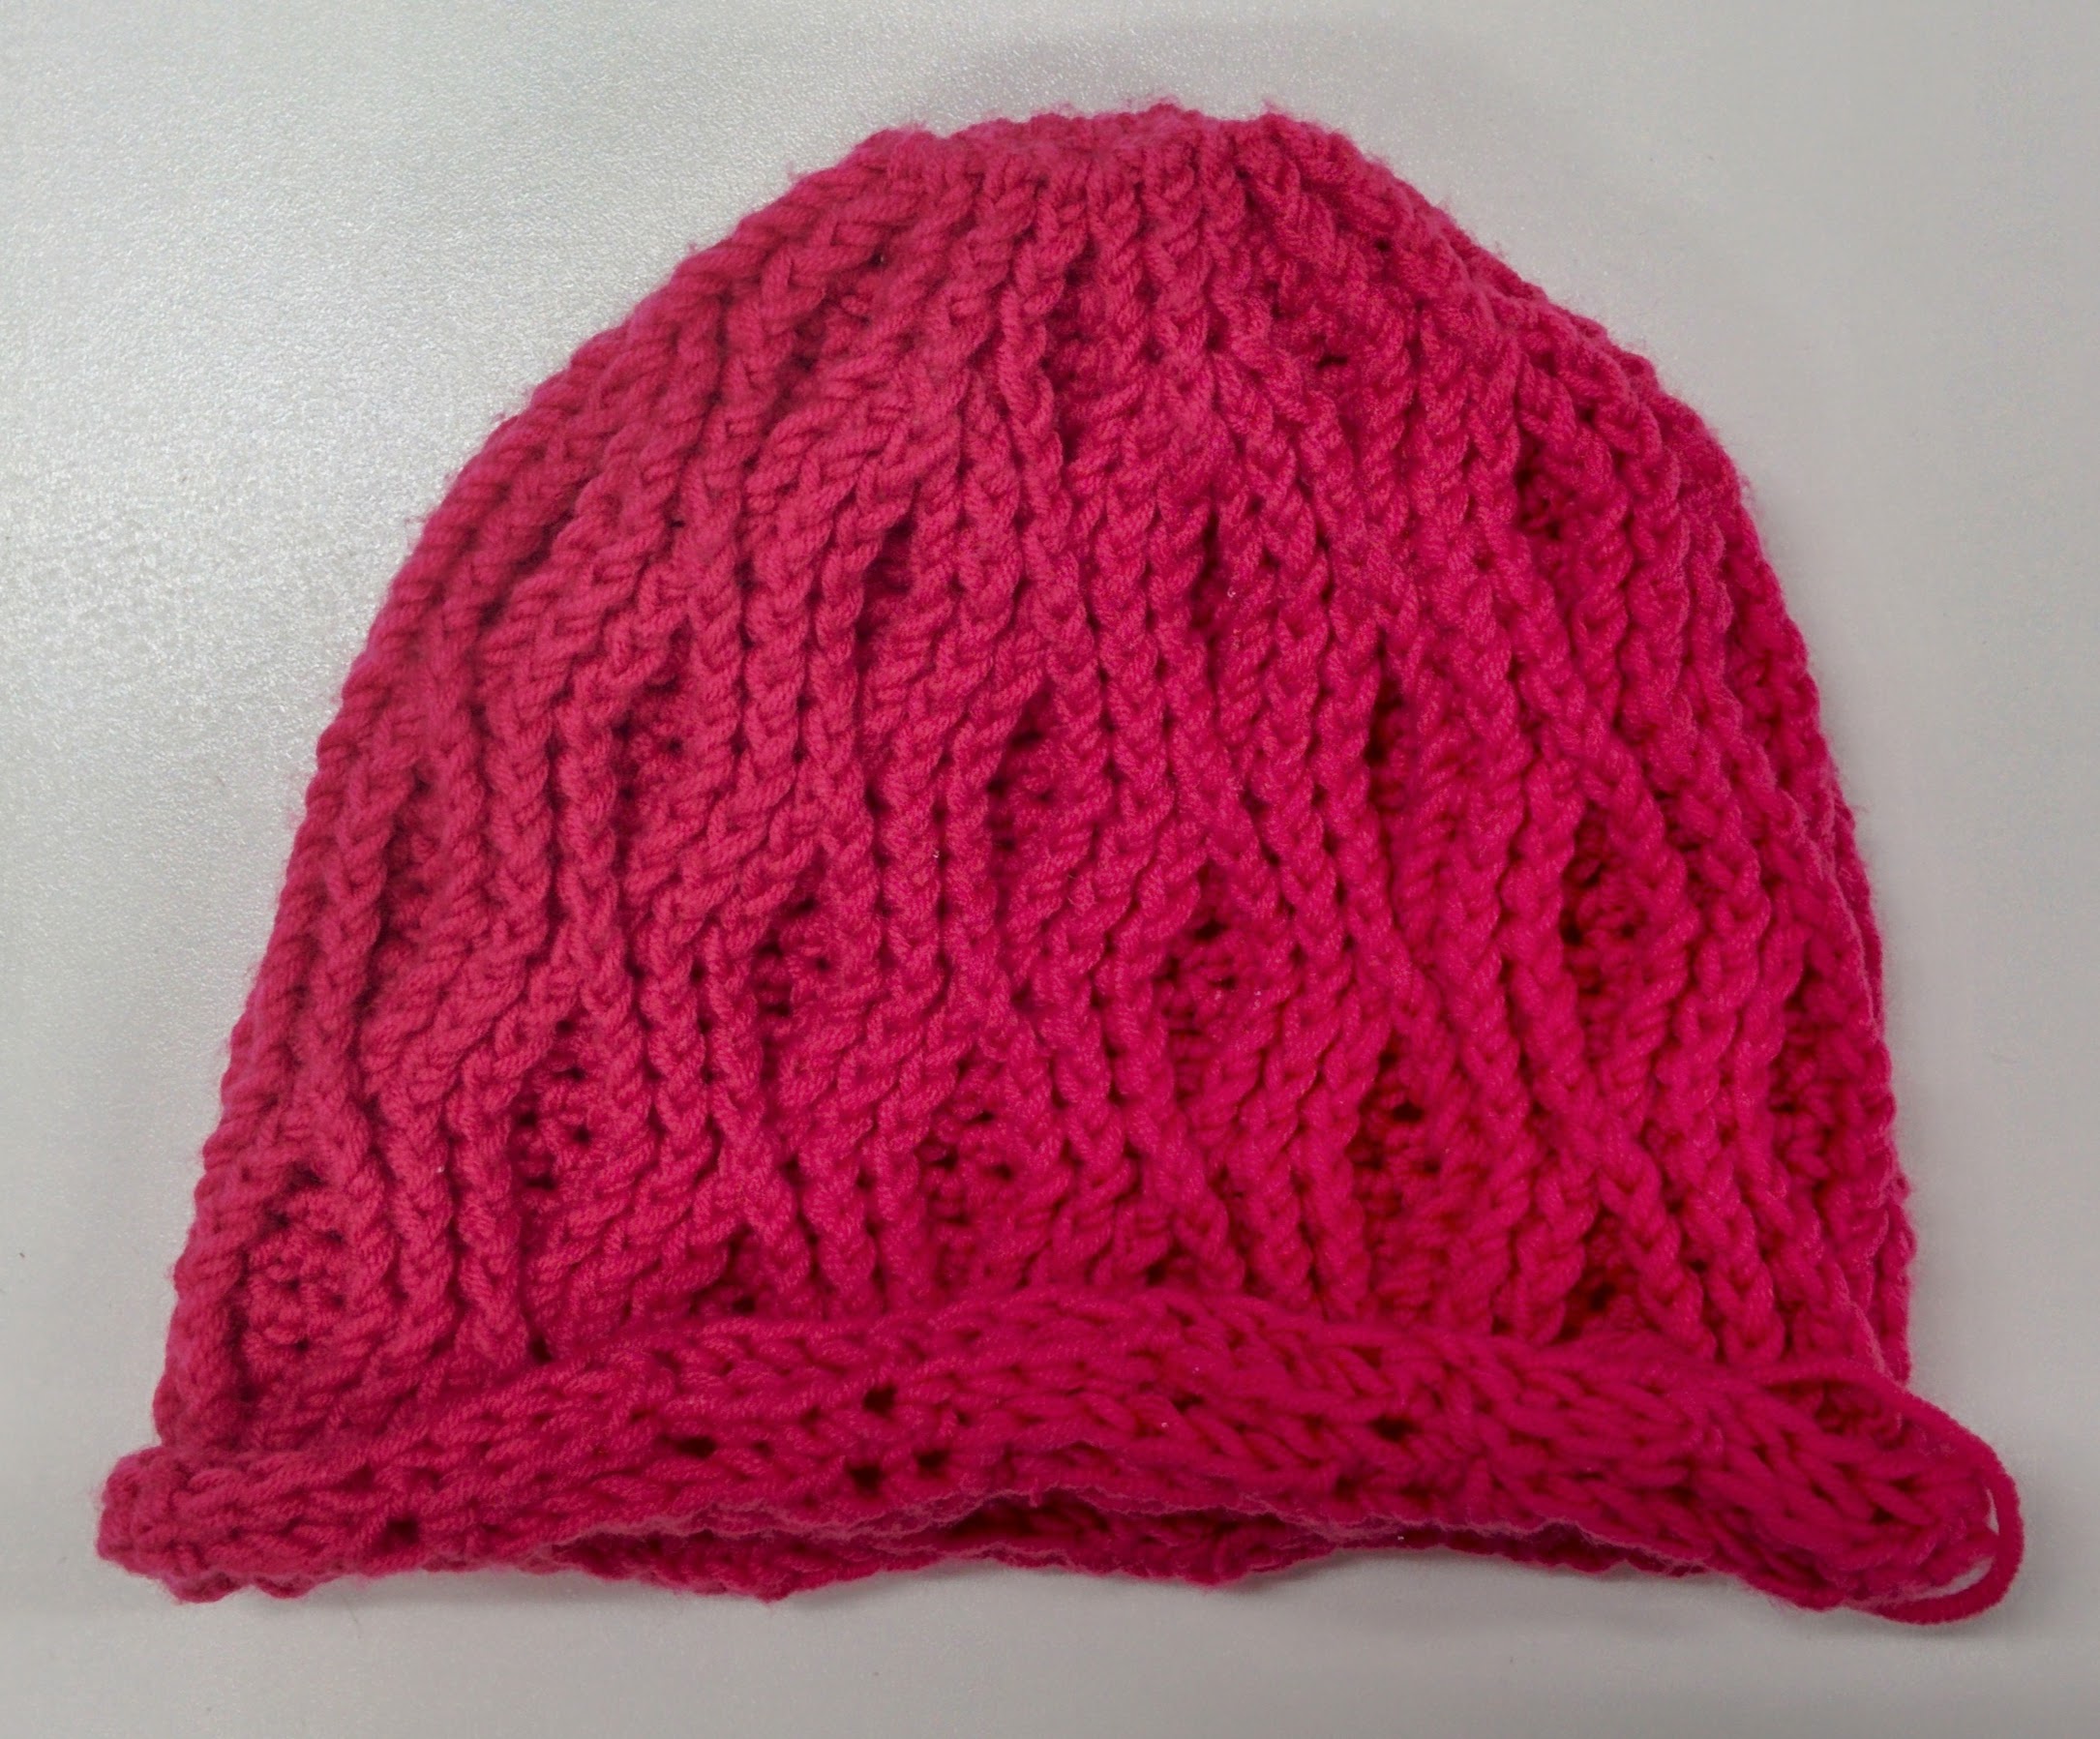
And the black hat, this one from Grignasco Loden, again with the 5.5 mm hook

But shhh, don’t tell, they’re both surprises :)

Pink diamond beanie for Flick

Today is a two hat day, earlier I shared the granny stitch beret that I made for my friend Sam, and now I have a pink diamond beanie for another friend of mine, Flick. This hat will be a surprise present, because Flick’s been having a tough time lately and last time I saw her she was wearing a knitted beanie that was sadly stretched out and in need of retirement. She also loves pink.

When I’m making a beanie the first place I turn for patterns is Aaron Matthew Asmussen’s Ravely page, because I simply adore he’s patterns, all of which make great use of post stitches to create lovely cable designs, you can find other hats that I made from Aaron’s patterns here.

This time I chose a new pattern, the Nested Diamond Beanie, and paired it with a worsted weight (10-ply) yarn from the Morris Empire range in the colourway ‘Cha-Cha’ – beautiful soft Australian Merino, as pink as pink can be.

This is the fourth hat that I’ve made using Aaron’s patterns and, while I would definitely maintain that these aren’t beginner patterns, I’ve found that with each one they become easier. Part of this is that I’m getting use to the more complex post stitches these patterns use. But I think that I’m also gaining a better understand of how these stitches actually work together for form the pattern, so that once I get started, I don’t have to refer back to the pattern often, because what comes next is clear to me.

pink cable crochet beanie_20140829_150910

To that end, that this hat was finished in just a few hours! Although at first I was worried that I might have made it too small. The pattern is for a medium hat, I assume that this is a uni sex or mans medium, which would mean a women large. You change the size of these patterns by changing the hook you use, since I have a largish head, and Flick does too I stuck with the 5 mm hook suggested by the pattern.

pink cable crochet beanie_20140829_131002

The beanie stretched to fit my head, but it felt a bit snug. However, with al of the cable stitches that formed the diamond pattern, I knew that there was a lot of pressure pulling the stitches in, and a lot of potential to block the hat.

How do you block a hat? You might ask. (Well unless it’s a beret, because I covered that in my last post.) Normally I block an item by wetting it and pinning it out to dry. However, we don’t want to flatten out our lovely round hat to pin it. So we need something head shaped and head sized, ideally sized to the head we want to hat to fit.

The answer… a balloon!

pink cable crochet beanie_20140829_151537

I simply blow up the ballon so that at its widest point it matches the circumference of the head I want the hat on. Then I wash the hat, stretch it over the ballon, and prop the balloon up in a mug.

pink cable crochet beanie_20140831_123721

And there we have it, and blocked beanie, what a difference it makes! Now it fits perfectly, not to mention that the fabric has much more drape to it, and the pattern stands out wonderfully.

I did find that the last row of the beanie was still curling up, so I simply ripped that row back and the next sat flat. This was fine because I’d made the beanie on the long side, since I can rip back after blocking, but if I had to crocheted more rows, those would need to be blocked as well.

pink cable crochet beanie_20140831_133749

pink cable crochet beanie_20140831_133751

Post stitches

I do love post stitches, they give such wonderful texture to crochet, make for lovely cable patterns, and fabrics with lots of stretch.

Crochet cable hat with dog fur yarn_20140518_161110

Here’s just one of my favourite cable projects

eternal serpent crochet scarf_20140722_144405

And here’s my eternal serpent cable scarf :)

Cable stitches are very easy, they simply require a basic understanding of crochet stitch anatomy. (Right-handed photos on top, left-handed below)

post stitches 1_RH

post stitches 1

Here we have a double crochet stitch. In the pink we can see the two loops (back and front) that make up the ‘v’ at the top of the stitch, into which we would normally work. The blue is what I like to call the leg of the stitch, or the mid loop. And the green shows the body of the stitch, the post around which we work our post stitches.

Front-post stitches

post stitches 2_RH

post stitches 2

And here’s a row of fount-post double crochet (in black) that I’m part way through, I’ve just reached the coloured stitch.

post stitches 3.5_RH

post stitches 3.5
To create the post stitch, we insert our hook behind the post of the stitch. Below the v (pink) and the leg (blue). Because this is a front-post stitch, we bring our hook to the front of the work, insert it behind the post and out the other side.

post stitches 3.6_RH

post stitches 3.6

Yarn over.

post stitches 3_RH

post stitches 3

And pull the loop around the post.

post stitches 4_RH

post stitches 4
From here we complete the double crochet as normal (or whatever stitch it is that we’re making). And we have a front-post double crochet stitch.

post stitches 5

Here’s a row of front-post double crochet.

post stitches 6

On the other side of the work, we can see the vs from the top of the stitch, that have been left unworked. You might recognise that when we make a front-post stitch, we end up with a back-post stitch on the back of our work. That means that when we turn the work and go back in the other direction, we’d end up with alternating front-post and back-post stitches (unless we switched to back-post stitches for the alternating rows).

Back-post stitches

post stitches 8_RH

post stitches 8

If we want to make a back-post stitch, we simply take our hook to the back of the work, then insert it around the post.

post stitches 9_RH

post stitches 9

We pull the loop around the post, and finish the double crochet.

post stitches 6_RH

And we have our back-post stitches again.

Cables

Back and front-post stitches form the basis for making cables in crochet

eternal serpent crochet scarf_20140722_144437

Front-post stitches form cables by raising the body of the stitches, so that the cables run perpendicular to the direction we work in, as you can see to the left in my eternal serpent scarf. When we use back-post stitches, which you see to the right, the cables are actually the unworked vs of the stitches below, and so they run parallel to the direction of the work. Of course front-post cables on one side of the work will result in back-post cables on the other, which is actually what you’re seeing here.

And this is a very simple cable pattern. Post stitches can be used to create much more complex cables, often involving skipping stitches, combining different types of stitches, and working into skipped stitches. But all of these use front and back-post stitches as their fundamental uni

Post stitch increases 

Sometimes a pattern will call for you to crochet into the same stitch as the post stitch. This creates an increase, because there will be two stitches into the one below.

post stitches 10_RH

post stitches 10

Here we have the front-post double crochet already created. We can see the blue leg of the stitch and the pink vs behind the post stitch.

post stitches 11_RH

post stitches 11

We insert our hook under the v, just like when we make a normal stitch.

post stitches 12_RH

post stitches 12

From here we pull up a loop and complete the double crochet. You can see that we’ve got a front-post double crochet stitch and a normal double crochet stitch both made into the stitch of the row below.

I find that it’s good to pay extra attention when reading a pattern with post stitches. A pattern might call for you to increase by making two post stitches into the stitch below, or by making a post stitch and a normal stitch. With a basic understanding of post stitches, it’s not hard to see the difference between instructions like this, but it is easy to get lost if you’re not paying enough attention.

Blue diamond beanie

Guess what? Did you guess? That’s right, I’ve made a hat. Another one!!!

blue diamond crochet beanie_20140615_124345

This ‘blue diamond beanie’ is based off the Stacked Large Diamond Beanie pattern by Aaron Mathew Asmussen. It’s the third hat that I’ve made from one of Aaron’s patterns, I just love these cable designs! This was probably the most complex pattern I’ve done so far, because of the number and variety of increases and decreases, but once you get the hang of this kind of cable work it’s all much of the same. I certainly wouldn’t recommend these patterns for beginners. However, if you’re after a bit of a challenge, give them a go!

This hat is a present for my friend Loz, who was also the recipient of Zilly the godzilla girl. Because I wasn’t making a big man hat Iike I’d made before, I figured that I didn’t have to increase my hook size to increase the gauge of the pattern. However, when I started working it quickly became evident that the Morris Woollahra yarn I was working with wasn’t what I’d call worsted-weight. Therefore, I decided to increase my hook size from the 5 mm called for in the pattern to 6 mm, and to make sure that I wasn’t crocheting with tight tension. This worked nicely, and I ended up with a hat that was around medium size, perfect for a women.

But then I washed it…

blue diamond crochet beanie_20140614_141647

And apparently Morris Woollahra grows! It still fitted my head okay, but it became too long. I think that this wasn’t just because the yarn grows when washed… The last few rounds have a much higher ratio of half-double crochets to front-post half-double crochets. Post stitches overlap each other, while normal stitches stack one on top of the other. Therefore, when all the stitches settled into place, the sections with large amounts of normal half-double crochet stitches ended up longer.

I realised that I could fix this without too much trouble.

blue diamond crochet beanie_20140614_144026

First I ripped back a few rows, three I believe. (Apparently I’m really good at weaving in ends, it was very difficult to work out which one belonged to the end of the work!)

blue diamond crochet beanie_20140614_145828

Then I crocheted two rows of alternating front-post half-double crochet and back-post half-double crochet. This resulted in the hat being shorter, and provided the elasticity needed to create a nice snug brim.

Washing also softened the Morris Woollahra nicely. Woollahra is a really unusual yarn, I’d be very interested to know how it’s made. It’s made from 85% wool, 10% silk and 5% cashmere, but it doesn’t feel like I’d expect for that composition. It almost feels brittle, it breaks very easily, so much so that you need to be careful when untangling or ripping back. It’s kind of like the yarn has been dried out, and when it’s washed it puffs up and softens considerably. A very interesting yarn, but it’s probably best to wash your swatch!

blue diamond crochet beanie_20140615_124808

Happy hat, ready to go to a new home :)

Moo cozy

moo minicards_20140611_122251

They arrived! I’m very excited!!! My blog minicards; they’re business cards, for my blog, and they’re mini! You might we wondering why on earth I’d bother getting business cards for a blog? Particularly a small blog like this. I know that a lot of people I’ve mentioned them too have asked that. But to me it makes perfect sense… you see, I started this blog because I love fibre and fibre craft, and I wanted to share my passion with people. When I’m out and about, maybe on a bus or in a cafe, I’ll be spinning or crocheting, and people will often come up to me to ask what I’m doing.

So here I am talking to a person who has come up to me, a stranger on the street, to ask me about what I’m doing. Obviously this is just the kind of person I created this blog for, and of course I tell them about forever in fibre. But what are chances that by the end of the day, when they’re at home, doing whatever it is they do, they’ll be able to remember the name of that blog that random women told them about? It’s slim to none I’d imagine.

Enter the minicards, they’re a cute, simple, affordable way in which I can give people I meet in real life information about where to find me online. I thought that full sized cards would be over kill, when all I really wanted to do was direct people to this site. And the minicards are something different which will hopefully stand out, while not seeming as much of burden to keep hold of.

I got my minicards from Moo. There are lots of online sites for ordering business cards, but I remembered hearing about moo and minicards at some point in the past. And the site provided an easy way to start designing my cards then and there. They also informed me that I could get 100 cards for around $22… so that was that :)

moo minicards_20140611_121932

The cool thing about Moo is that you can put as many different images as you want on the back of their cards… in theory I could have had a different image on each of my 100 cards. I went with three, two (the serious ones) of my noro scarf and one of my Delle in the Kody fur hat, because she’s just so cute!

moo minicards_20140611_122116

The other side of the cards have to be the same, I added a small image of my pink sari silk rolags and then used Moo’s text entry option to add my details, keeping it simple: blog name, tag line, url and email. In the future I think I’ll design this side of the card myself in an image editing program, so that I have more choices in typeface and layout. But for a first run, I’m really very happy with how they turned out.

The cards are made with really nice thick card stock, thicker then I would have hoped for, given the price. I went with the matte finish, so that they’d be easier to write on if I needed too. Glossy would probably show off my images better, but I do like the feel of the matte.

moo minicards_20140611_101658

The first thing I needed to do when my minicards arrived was make them a cozy! Because if I’m going to be carrying them around, I need something to keep them in and protect them.

Cozies are great projects for improvisation. So I grabbed some yarn (fingering-weight (4-ply) hand-dyed Bluefaced Leiceister in Cat’s Eye Green from Ancient Arts), a hook (3 mm), a pile of minicards (I went with 27 because it seemed like a good number) and started crocheting.

moo minicards_20140611_102055

I started with a chain of five (yes, I know that I just finished extolling the virtues of foundation crochet, but sometimes things are just too itty bitty for that). The good thing about improvising cozies is that you can check the fit to your object at each step.

moo minicards_20140611_102337

Then I start single crocheting around the chain, making sure to increase at the beginning and end chain by crocheting into them three times.

moo minicards_20140611_102657

I continue around the chain, making three single crochets in each corner so that my rectangle grows flat. Until I get to the point where I’ve covered the base of the object. Now I stop increasing, and make a few more rows crocheting once into every stitch below. This gives me a solid base for my cozy. moo card cozy When I decide that my base is done, it’s time to get more elaborate. I went with a cable design, starting with a row of half-double crochet, then going into alternating front-post half-double crochet and half-double crochet, and seeing where my imagination took me from there.

Because I wanted to keep the design simple, I finished the cozy with a few rows of alternating front-post half-double crochet and half-double crochet extending past the hight of the cards. This pulls the top of the cozy in, holding the cards in place and protecting them, while being stretchy enough that I can easily pull it down to take out a card.

Here’s the pattern for my cozy:

Continue reading