
They arrived! I’m very excited!!! My blog minicards; they’re business cards, for my blog, and they’re mini! You might we wondering why on earth I’d bother getting business cards for a blog? Particularly a small blog like this. I know that a lot of people I’ve mentioned them too have asked that. But to me it makes perfect sense… you see, I started this blog because I love fibre and fibre craft, and I wanted to share my passion with people. When I’m out and about, maybe on a bus or in a cafe, I’ll be spinning or crocheting, and people will often come up to me to ask what I’m doing.
So here I am talking to a person who has come up to me, a stranger on the street, to ask me about what I’m doing. Obviously this is just the kind of person I created this blog for, and of course I tell them about forever in fibre. But what are chances that by the end of the day, when they’re at home, doing whatever it is they do, they’ll be able to remember the name of that blog that random women told them about? It’s slim to none I’d imagine.
Enter the minicards, they’re a cute, simple, affordable way in which I can give people I meet in real life information about where to find me online. I thought that full sized cards would be over kill, when all I really wanted to do was direct people to this site. And the minicards are something different which will hopefully stand out, while not seeming as much of burden to keep hold of.
I got my minicards from Moo. There are lots of online sites for ordering business cards, but I remembered hearing about moo and minicards at some point in the past. And the site provided an easy way to start designing my cards then and there. They also informed me that I could get 100 cards for around $22… so that was that :)

The cool thing about Moo is that you can put as many different images as you want on the back of their cards… in theory I could have had a different image on each of my 100 cards. I went with three, two (the serious ones) of my noro scarf and one of my Delle in the Kody fur hat, because she’s just so cute!

The other side of the cards have to be the same, I added a small image of my pink sari silk rolags and then used Moo’s text entry option to add my details, keeping it simple: blog name, tag line, url and email. In the future I think I’ll design this side of the card myself in an image editing program, so that I have more choices in typeface and layout. But for a first run, I’m really very happy with how they turned out.
The cards are made with really nice thick card stock, thicker then I would have hoped for, given the price. I went with the matte finish, so that they’d be easier to write on if I needed too. Glossy would probably show off my images better, but I do like the feel of the matte.

The first thing I needed to do when my minicards arrived was make them a cozy! Because if I’m going to be carrying them around, I need something to keep them in and protect them.
Cozies are great projects for improvisation. So I grabbed some yarn (fingering-weight (4-ply) hand-dyed Bluefaced Leiceister in Cat’s Eye Green from Ancient Arts), a hook (3 mm), a pile of minicards (I went with 27 because it seemed like a good number) and started crocheting.

I started with a chain of five (yes, I know that I just finished extolling the virtues of foundation crochet, but sometimes things are just too itty bitty for that). The good thing about improvising cozies is that you can check the fit to your object at each step.
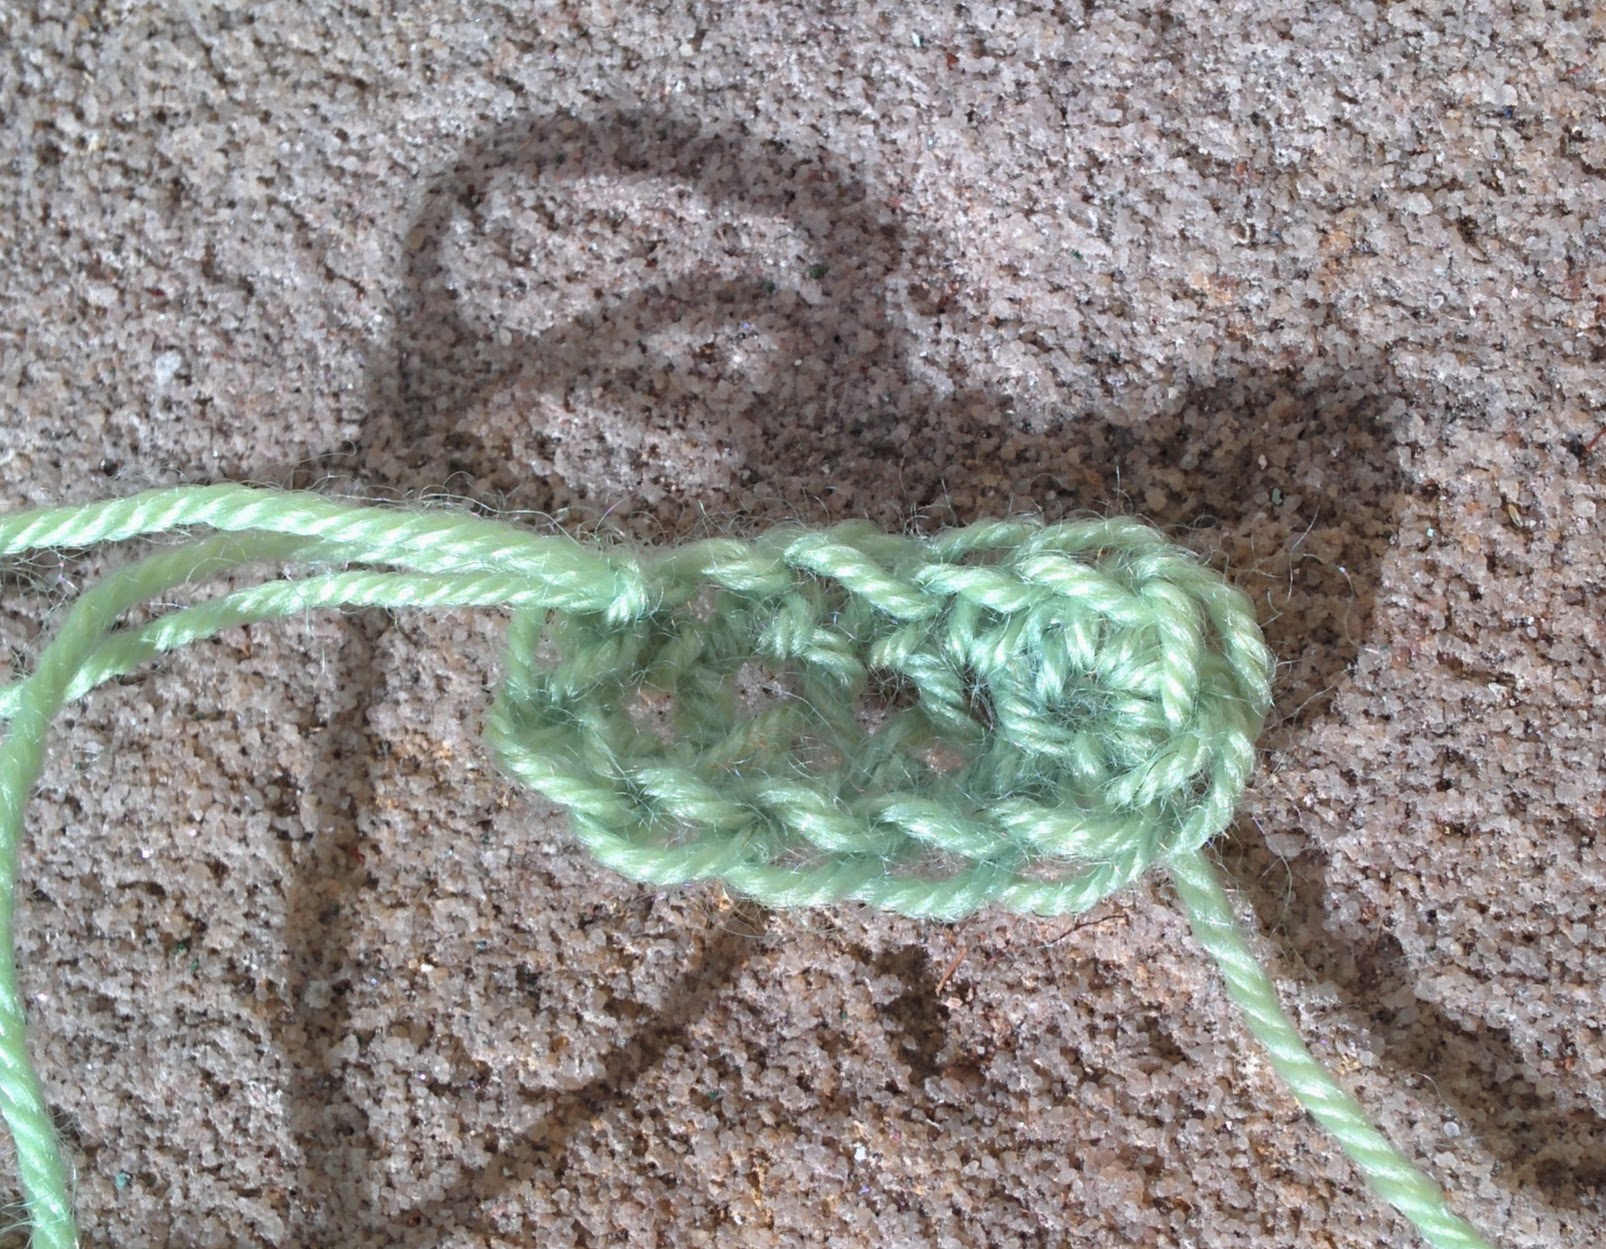
Then I start single crocheting around the chain, making sure to increase at the beginning and end chain by crocheting into them three times.

I continue around the chain, making three single crochets in each corner so that my rectangle grows flat. Until I get to the point where I’ve covered the base of the object. Now I stop increasing, and make a few more rows crocheting once into every stitch below. This gives me a solid base for my cozy.  When I decide that my base is done, it’s time to get more elaborate. I went with a cable design, starting with a row of half-double crochet, then going into alternating front-post half-double crochet and half-double crochet, and seeing where my imagination took me from there.
Because I wanted to keep the design simple, I finished the cozy with a few rows of alternating front-post half-double crochet and half-double crochet extending past the hight of the cards. This pulls the top of the cozy in, holding the cards in place and protecting them, while being stretchy enough that I can easily pull it down to take out a card.
Here’s the pattern for my cozy:
